


DIY CO2 for Aquarium Plants: The Budget Method That Actually Works
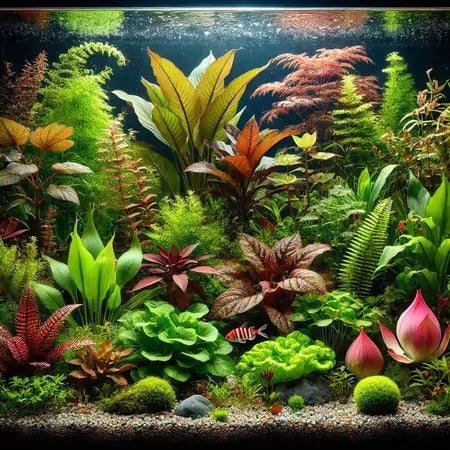
CO2 injection can transform a mediocre planted tank into something spectacular — faster growth, more vibrant colors, and the ability to grow demanding species that won't survive without it. But pressurized CO2 systems cost $150–$400+, which puts them out of reach for many hobbyists.
Enter DIY CO2 — a budget alternative that can deliver real results for $20–$40 in materials. This guide covers the most reliable DIY method: the citric acid and baking soda reactor, which is more consistent and controllable than the old yeast-and-sugar approach.
Why CO2 Matters for Aquarium Plants
Carbon dioxide is the single most important nutrient for plant growth — and it's usually the limiting factor in aquariums. The air contains about 400 ppm of CO2, but aquarium water typically holds only 3–5 ppm naturally. Most aquarium plants grow optimally at 20–30 ppm.
Adding CO2 to your tank means:
- 2–5x faster growth rates for most species
- Stronger, more vibrant colors — especially in red plants like Ludwigia and Rotala
- Ability to grow high-demand species — carpet plants, many stem plants, and specialty species
- Less algae — healthy, fast-growing plants outcompete algae for nutrients. CO2-supplemented tanks with good plant mass typically have fewer algae problems, not more.
DIY CO2 Methods Compared
| Method | Cost | Consistency | Control | Duration |
|---|---|---|---|---|
| Yeast & Sugar | $5–$10 | Poor — output decreases over time | None | 2–3 weeks per batch |
| Citric Acid & Baking Soda | $20–$40 | Good — steady output | Moderate (needle valve) | 4–8 weeks per refill |
| Pressurized (not DIY) | $150–$400 | Excellent | Full (solenoid + timer) | Months per canister |
The Citric Acid & Baking Soda Method
How It Works
This system uses two soda bottles connected by tubing. Bottle A contains a citric acid solution. Bottle B contains a baking soda solution. When you squeeze Bottle A, citric acid flows into Bottle B, reacting with baking soda to produce CO2 gas. The gas exits Bottle B through a tube into your aquarium.
Materials Needed
- Two 2-liter soda bottles with caps
- Airline tubing
- A bubble counter (or make one from a small bottle)
- A check valve (prevents water backflow into the system)
- An aquarium diffuser (ceramic or glass — this dissolves CO2 into the water)
- A needle valve (optional but strongly recommended for flow control)
- Citric acid powder (available at grocery stores or online)
- Baking soda (sodium bicarbonate)
- Silicone sealant (for sealing cap connections)
Setup Steps
- Prepare Bottle A (Citric Acid): Mix 200g citric acid with 600ml warm water. Shake until dissolved.
- Prepare Bottle B (Baking Soda): Mix 200g baking soda with 600ml water. It won't fully dissolve — that's normal.
- Connect the bottles: Drill two holes in each cap. In Bottle A, one tube goes down into the liquid (this tube connects to Bottle B). The other tube is a pressure relief/equalization line. In Bottle B, one tube comes from Bottle A (submerged in liquid), and the output tube goes to your aquarium.
- Seal all connections with silicone sealant. Any air leak kills the system's effectiveness.
- Add the safety chain: Output from Bottle B → needle valve → bubble counter → check valve → diffuser in tank.
Operating the System
Squeeze Bottle A gently to push citric acid into Bottle B. The reaction produces CO2 immediately. Adjust the needle valve until your bubble counter shows 1–2 bubbles per second for a 10–20 gallon tank, or 2–3 bubbles per second for larger tanks.
The system is self-pressurizing — once the initial reaction starts, it maintains pressure on its own, continuously pushing citric acid into the baking soda solution. A single refill lasts 4–8 weeks depending on your flow rate.
Important Safety Notes
- Always use a check valve between the system and your tank. Without it, water can siphon back into the CO2 generator.
- Don't run CO2 at night. Plants don't use CO2 in the dark, so it just builds up, drops pH, and can stress fish. If you can't add a solenoid valve to shut off flow automatically, manually disconnect the airline before lights-off.
- Monitor your fish. If fish are gasping at the surface, you're injecting too much CO2. Reduce the flow rate immediately and increase surface agitation.
- Use a drop checker (a small glass device filled with indicator solution that hangs inside your tank). It turns green at ideal CO2 levels, blue when too low, and yellow when too high.
Is DIY CO2 Worth It?
For tanks under 30 gallons, absolutely. The citric acid method provides enough CO2 to make a genuine difference in plant growth and color. You'll be able to grow species that previously struggled, and your existing plants will grow noticeably faster and healthier.
For tanks over 40 gallons, DIY CO2 struggles to keep up. The output simply isn't enough to maintain 20+ ppm in larger water volumes. At that point, investing in a pressurized system makes more sense.
Either way, CO2 supplementation — even imperfect DIY CO2 — is the single biggest upgrade you can make to a planted tank after good lighting. Your aquarium plants will thank you.

Ready to Upgrade Your Aquarium?
Check out our shop for a variety of fresh, farm-grown plants! Find the perfect options to enhance your aquarium today.
FEATURED BLOG
Glossostigma Elatinoides Care Guide: The Ultra-Low Carpet Plant


June 25, 2026
Glossostigma Elatinoides Care Guide: The Ultra-Low Carpet Plant
Best Aquarium Plants for Shrimp Tanks: Safe Species Your Shrimp Will Love


June 25, 2026
Best Aquarium Plants for Shrimp Tanks: Safe Species Your Shrimp Will Love
DIY CO2 for Aquarium Plants: The Budget Method That Actually Works

June 25, 2026
DIY CO2 for Aquarium Plants: The Budget Method That Actually Works
Aquarium Plant Nutrient Deficiency Guide: Identify and Fix Every Symptom


June 25, 2026
Aquarium Plant Nutrient Deficiency Guide: Identify and Fix Every Symptom
Paludarium Plants: Best Species for Your Half-Land, Half-Water Setup


June 25, 2026
Paludarium Plants: Best Species for Your Half-Land, Half-Water Setup
Riccia Fluitans Care Guide: Growing Crystalwort in Your Aquarium


June 25, 2026
Riccia Fluitans Care Guide: Growing Crystalwort in Your Aquarium
- Choosing a selection results in a full page refresh.
!